How do I create a customer record?
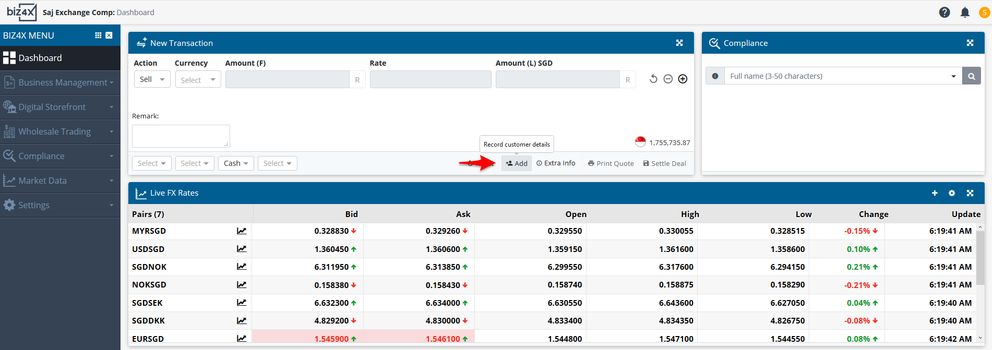
There are two ways to create a new customer, from the New Transactions widget on the Dashboard, or the dedicated interface you can access from the main menu by navigating to Business Management > Customers > New customer.
Adding a New Customer from the Dashboard
This method of adding a customer is best used with walk-in customers, as it is a quick and efficient way to add a new customer to Biz4x, while processing a transaction.

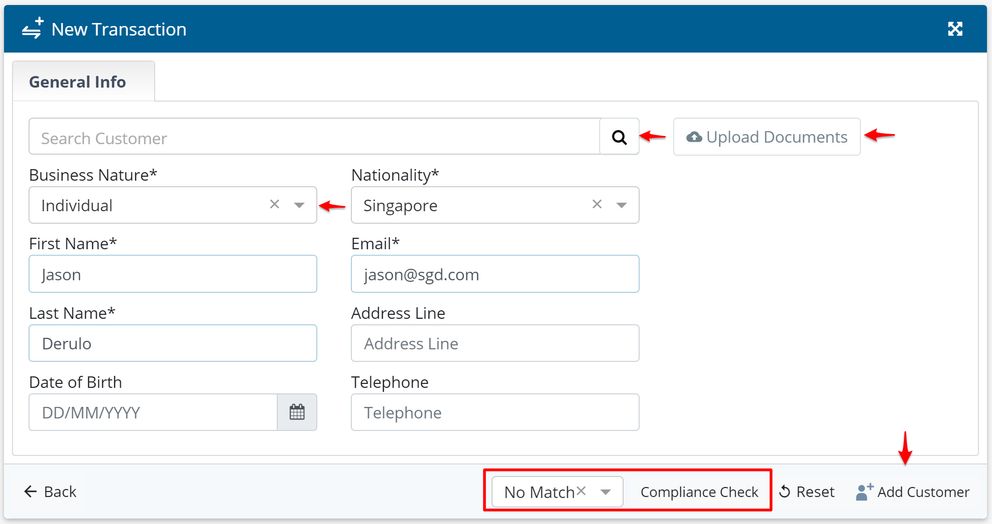
Click on the add customer icon and you will be able to access a number of fields to input new customer details or upload a customer identification document. You can add them to pre-existing customer groups under Business Nature, or perform a compliance check all in the same screen. If a compliance check shows that there is no match on any list, you can select the appropriate customer status such as No Match, Sanction Match, PEP Match. Warning Match and Other Match.

When you are done, simply select the option Add Customer, and this customer record will be saved in Biz4x.
If this is a customer that already exists in your system, you will be able to perform a search on the customer name. Once the correct name is selected, the form fields will be auto-filled, and you can associate this pre-existing customer with the transaction you are working on.
Adding a New Customer from the Dedicated Customer Interface
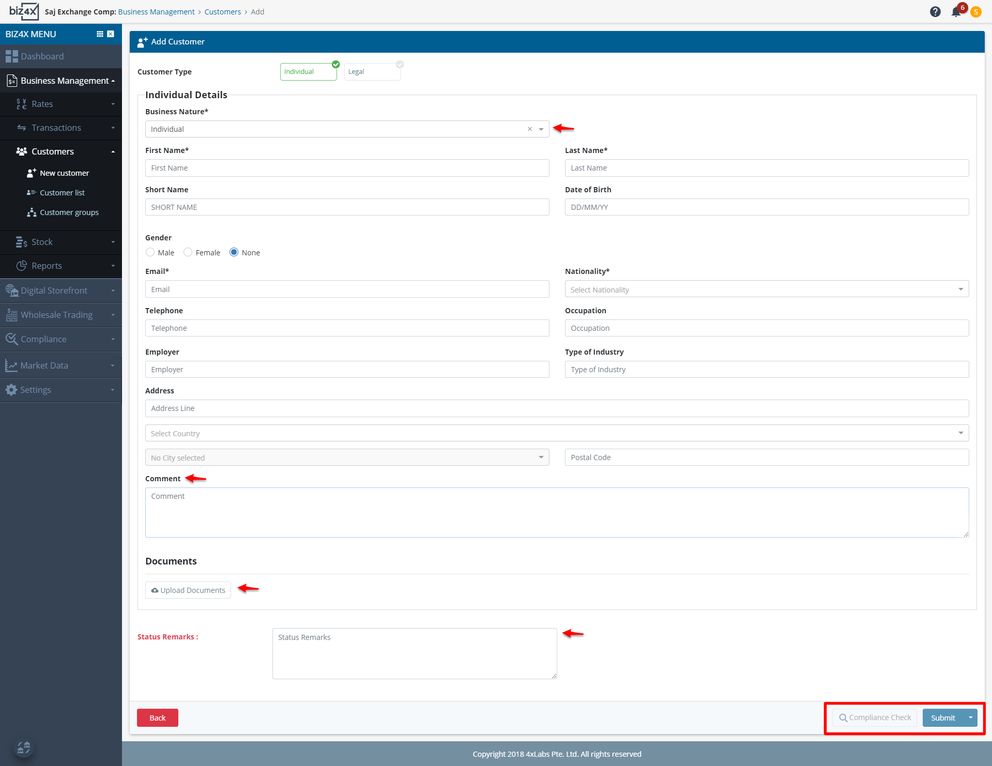
There are two main customer types you can create a record for, Individual and Legal, and each will provide different form fields. You will see the following form fields for an Individual customer.

As with the widget, under Business Nature, you can choose the customer group to which this new customer will be assigned. This can be built-in or custom groups. If none of the groups are appropriate, you can create a new custom group by navigating to Business Management > Customers> Customer groups. This new group will be available for selection after it is created. You can conduct a compliance check on this new customer, or upload identification documents as needed for KYC requirements, add comments and status remarks.

You can save this new customer record as a draft for now, if you are missing certain details that you need to complete the customer registration, or simply submit the customer registration.

If you are adding a Legal customer, you will see the following form instead.

You will notice that legal form is more focused on capturing business details and includes items like Company Type, Registration Number, Registration Date, Telephone, Email, Business Address and Mailing Address.
A key difference in the Individual and Legal input forms is the way contact details of individuals associated to a legal entity are recorded. Several individuals can now be linked to a business record with the Add New Contact option. Mandatory fields include ID numbers and the role these individuals play in the legal entity. These roles can be used to assess the type or amount of transactions that can be conducted with these individuals.

You will see a list of all contacts associated with a legal record under the Contacts section. Contacts are also assigned different statuses: Active and Inactive. An inactive contact would be one that was deleted previously. You will be able to filter the list of contacts according to their status.

As with the individual customer input screen, you can upload documents, run a compliance check, save these records as a draft, or simply submit this as a new legal customer that will be saved in Biz4x when done.
